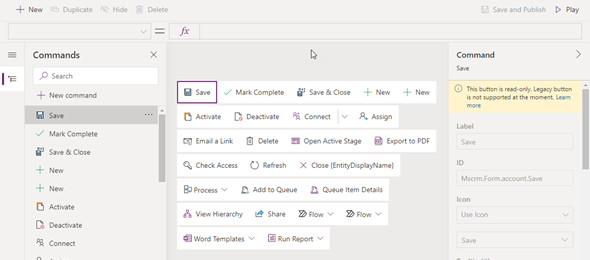
In preparation for our upcoming NYC BizApps event on October 27, 2021, and the Power Platform 2021 Wave 2 release (weekend of October 23/24), I am writing a series of blog posts related to some of the most sought after updates. In this post we will review the new modern commanding using Power FX.
Command bars are at the core of every model-driven app and appear in many different locations. They are arranged in relation to other commands and are associated with a command bar location. The group of commands associated with a specific location make up a command bar.
One of the biggest deficiencies of the Classic Commands, formerly known as the Ribbon, is that there is no low code solution to customize these commands. Command bars can be difficult to customize and error prone (although life has been simplified with the Ribbon Workbench by Scott Durow).
Modern command bars address some of the gaps and difficulties that we had with the legacy commands, and provide support for both Power FX and JavaScript.
Let’s go ahead and take a look at how we can implement modern commanding within our apps. I will use one of the apps that I previously created for this, and add a command bar button that will use Power FX to show/hide the button as well as a custom function that will execute on the click of the button.
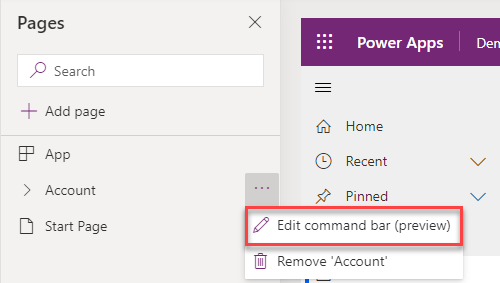
In order to start using the new Command functionality, we first need navigate to the page (table in this case) that we want to work with, and select the Edit command bar (preview) option by clicking on the more options to the right of the table name and selecting that option as shown in the image below. This has to be achieved from the Pages navigation pane.
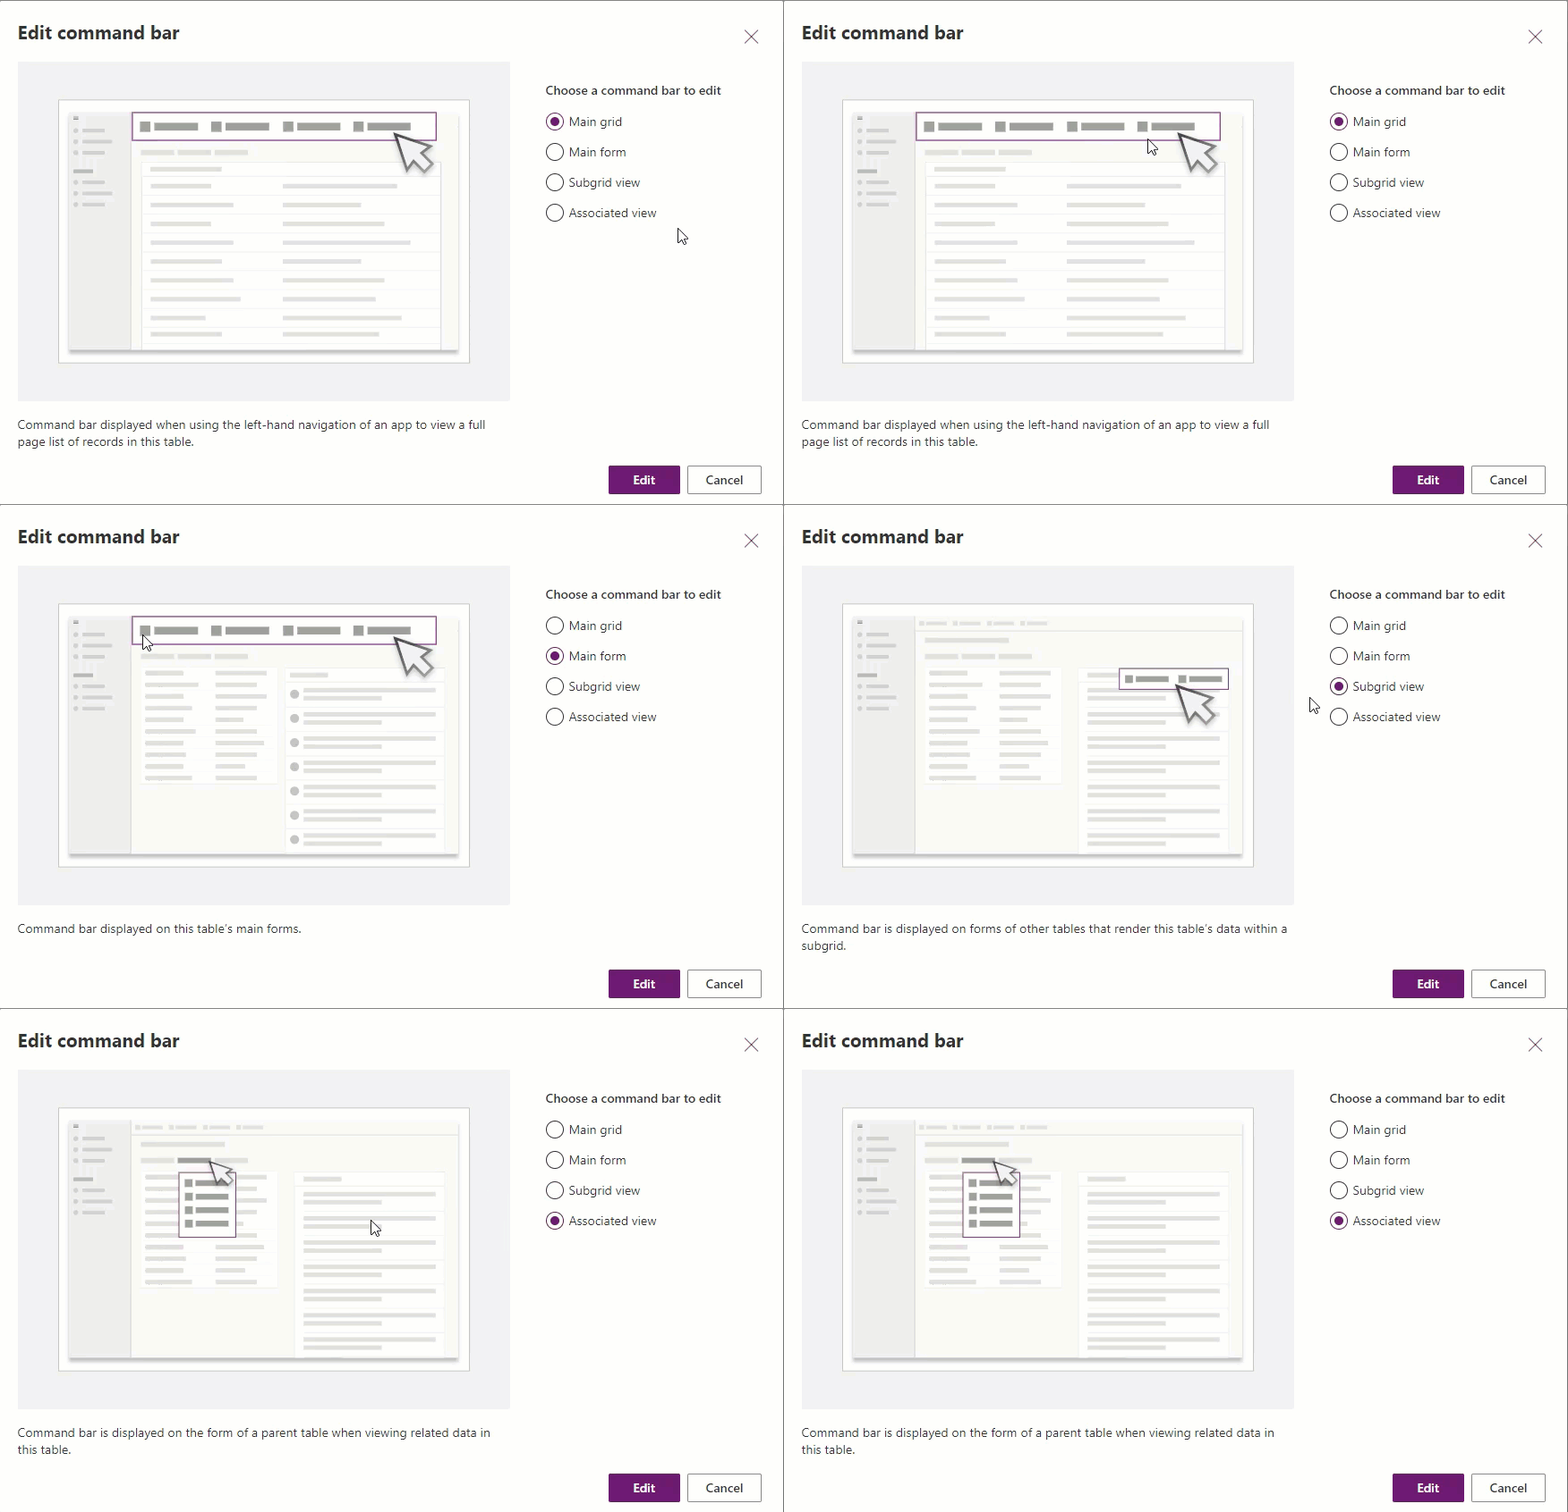
This will pop up a dialog where we have to select what command bar we would like to customize. There are four available options to select which include the Main grid, Main form, Subgrid view and Associated view. The image below shows these options.
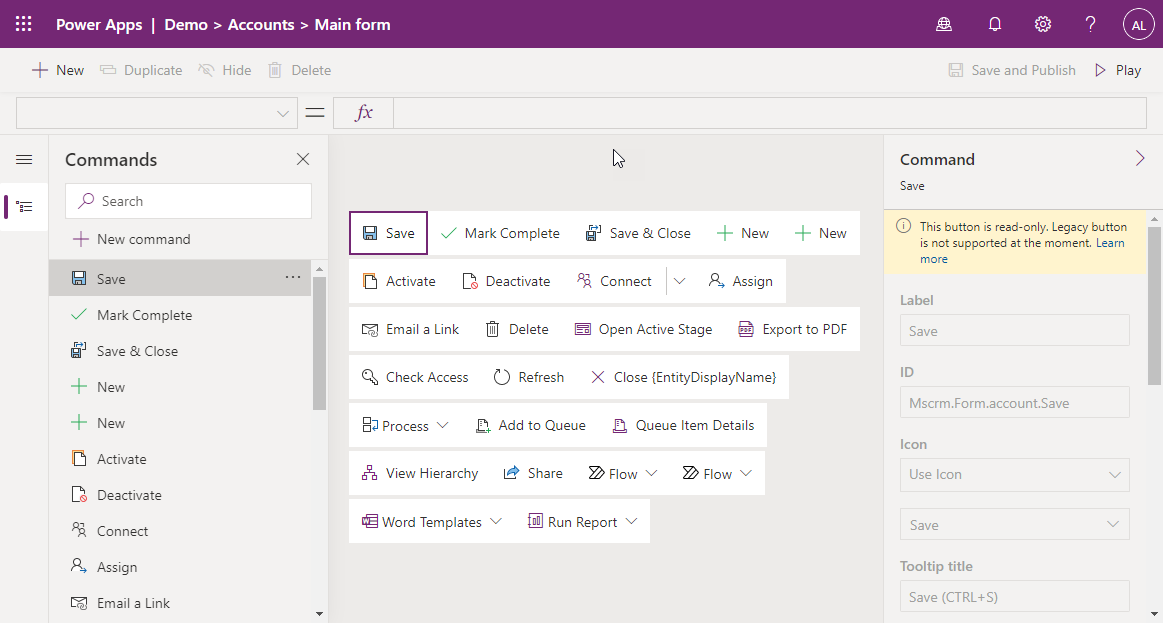
Let’s go ahead and select Main form. When the Commands page open, we will see a view that contains all of the existing command bar buttons that are available for the table within the Main form. At this point in time (as this is still in preview, and we don’t know the exact timeline of release), modifying the existing buttons is not currently supported, so any customizations that is needed for this, will have to be done using Ribbon Workbench. The image below shows you the Main form Command Bar before we have added any additional buttons.
Now let’s go ahead and create a new command. We will create a simple command that is called Calculate Credit Limit which when clicked will multiple the number of employees in the company by 10,000, and will set it to only be visible when the number of employees contains data.
To start creating a new command, we click on the new Command button on the top of the left navigation pane.
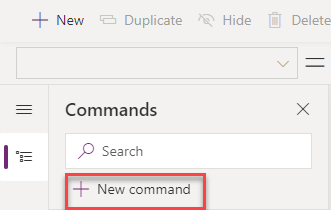
Once we click on the new command button, we will see that a has been created. We can move the command (using drag and drop) within the Main form to place it in the appropriate location, however this can only be done for new commands, and not the existing ones. Let’s provide the new command some of the properties, such as the Label, Icon to use and the Tooltip text.
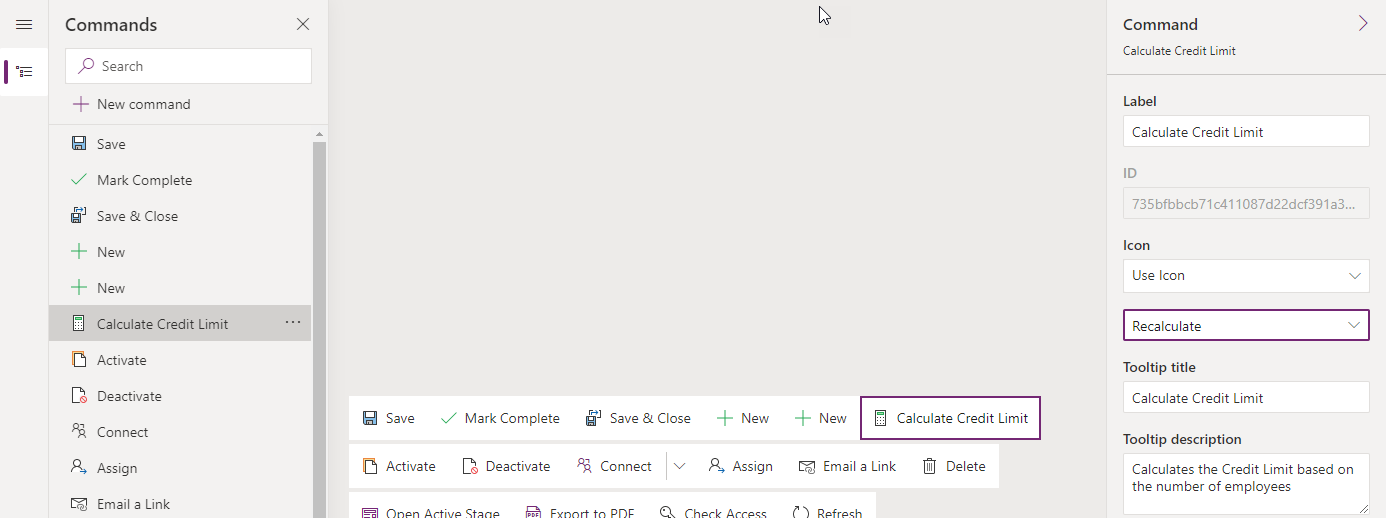
Next, we would like to set the functions for the Action that will be performed when the button is clicked as well as the Visibility of the button. On the right Command Pane, the last two options are Action and Visibility. The Action selection has two options: Run formula and Run JavaScript.
If we use the Run JavaScript option we can provide the name of the library and the name of the function to call when the button is clicked. This is more of a legacy type of action which might be used in the future for enabling the legacy buttons. The Run formula allows us to Run Power FX code when the command is clicked.
We can use the Patch function together with the Self.Selected.Item together in order to update the Credit Limit, and then compare the Number of Employees to Blank to control the visibility of the button. I am still working a few glitches as to what is working and what is not when it comes to Power FX for commanding, but the code below is working properly.
On Select:
Set(TotalCredit, Self.Selected.Item.’Number of Employees’ * 10000);
Patch(Accounts, Self.Selected.Item, {‘Credit Limit’: TotalCredit});
Visible:
Self.Selected.Item.’Number of Employees’ <> Blank()
The following Microsoft Docs pages provide an overview of Modern Commanding, directions on the use of the command designer and how to use Power Fx for modern commands.
- https://docs.microsoft.com/en-us/powerapps/maker/model-driven-apps/command-designer-overview
- https://docs.microsoft.com/en-us/powerapps/maker/model-driven-apps/use-command-designer
- https://docs.microsoft.com/en-us/powerapps/maker/model-driven-apps/commanding-use-powerfx
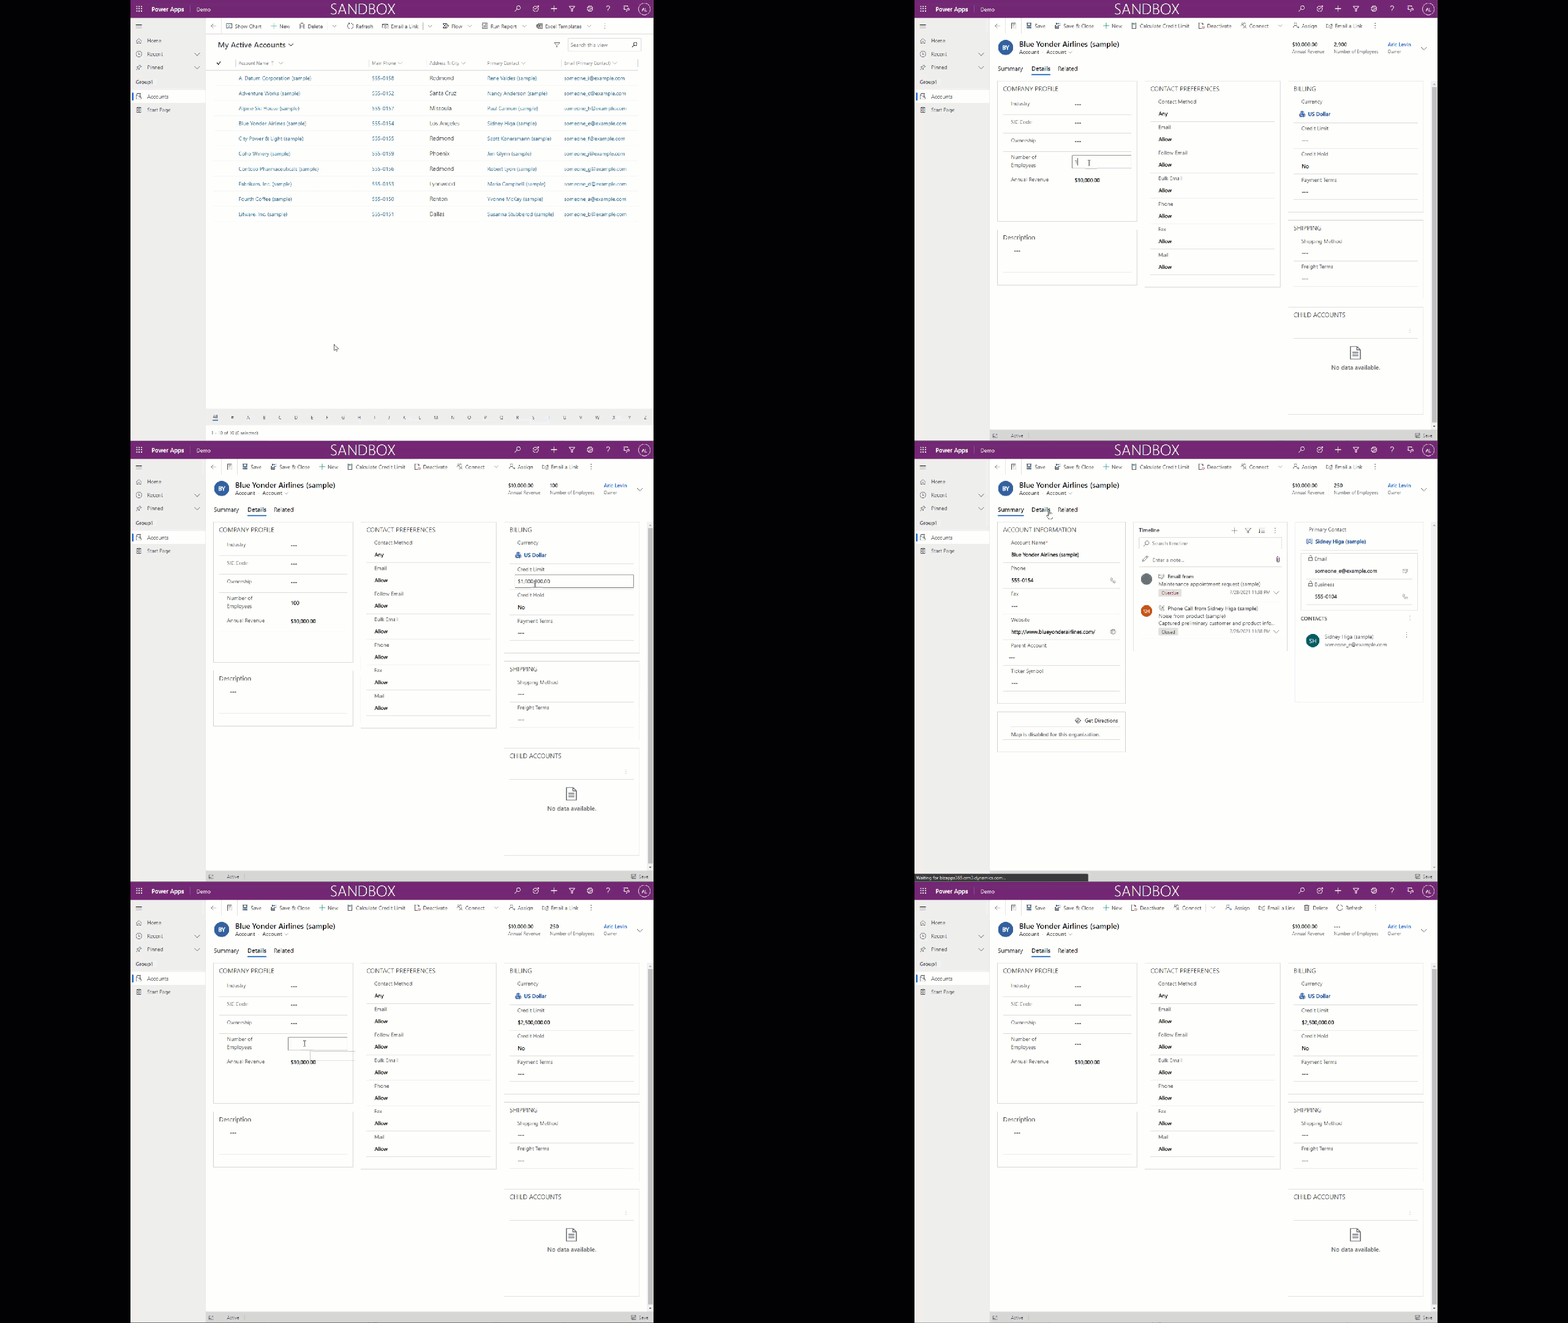
Now, let’s look at the end result after adding the button and publishing the app commands.
Additional posts related to the Dynamics 365 and Power Platform 2021 Release Wave 2 will be posted by following the link below:

