In my current role the matter of using a data lake has come up, and I wanted to get ready in case this implementation will become a need. I followed instructions from some of the published Microsoft blogs, and this blog post provides step by step instructions on how to configure the Azure Storage account to enable the Export to Data Lake feature as well as running the same process from within the Power Apps Maker Portal
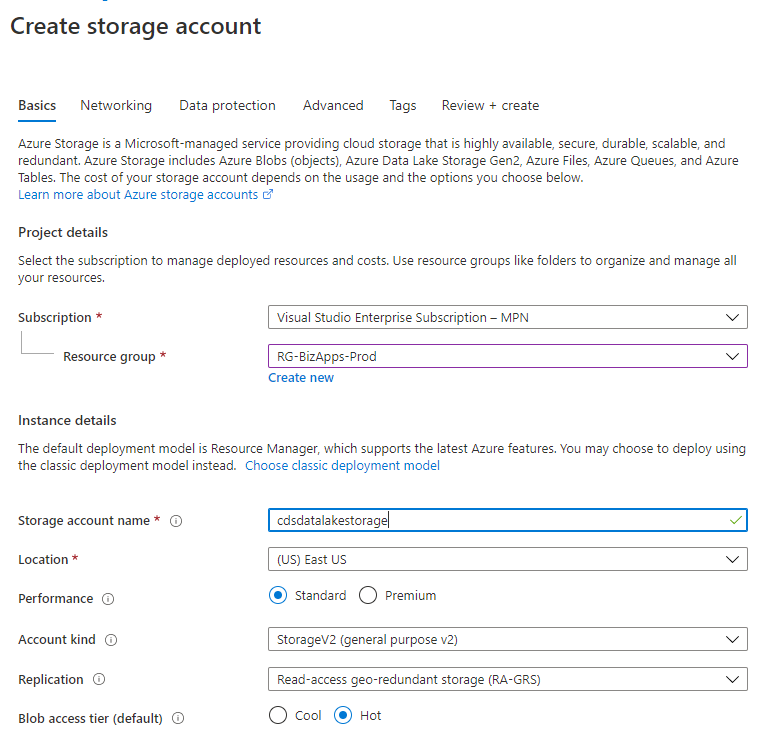
First thing is first, and that is creating the Azure Storage account. Assuming that you already have a resource group created, we will use the default settings after we click the New button on the Storage accounts pages. There we will select the Subscription and Resource Group, provide a name to the new storage account that we will be creating, select a location (which has to be in the same location as your Common Data Service instance), select the performance (Standard should be fine for testing), the account type should be set to StorageV2 (general purpose V2), the for replication you should be good to go with RA-GRS or Read-access geo-redundant storage. Leave the Blob access tier as Hot. The image below shows the settings that we have used for this Storage account.
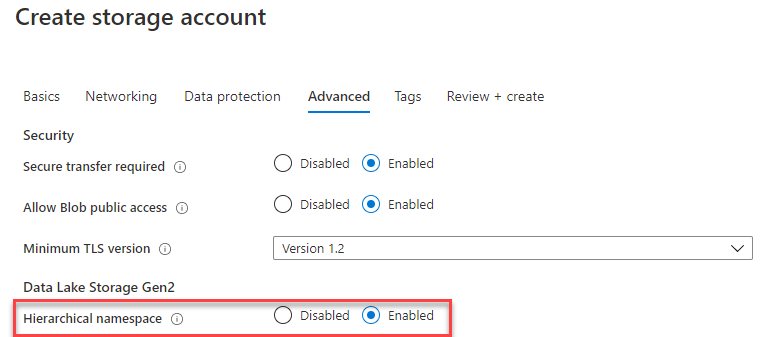
Make sure that you don’t press Create and Review button yet, as there is another important setting that has to be set before you create the Storage account. Navigate to the Advanced tab, and under the section Data Lake Storage Gen2, there is a settings called Hierarchical namespace. Set the setting to enabled, as shown in the image below.
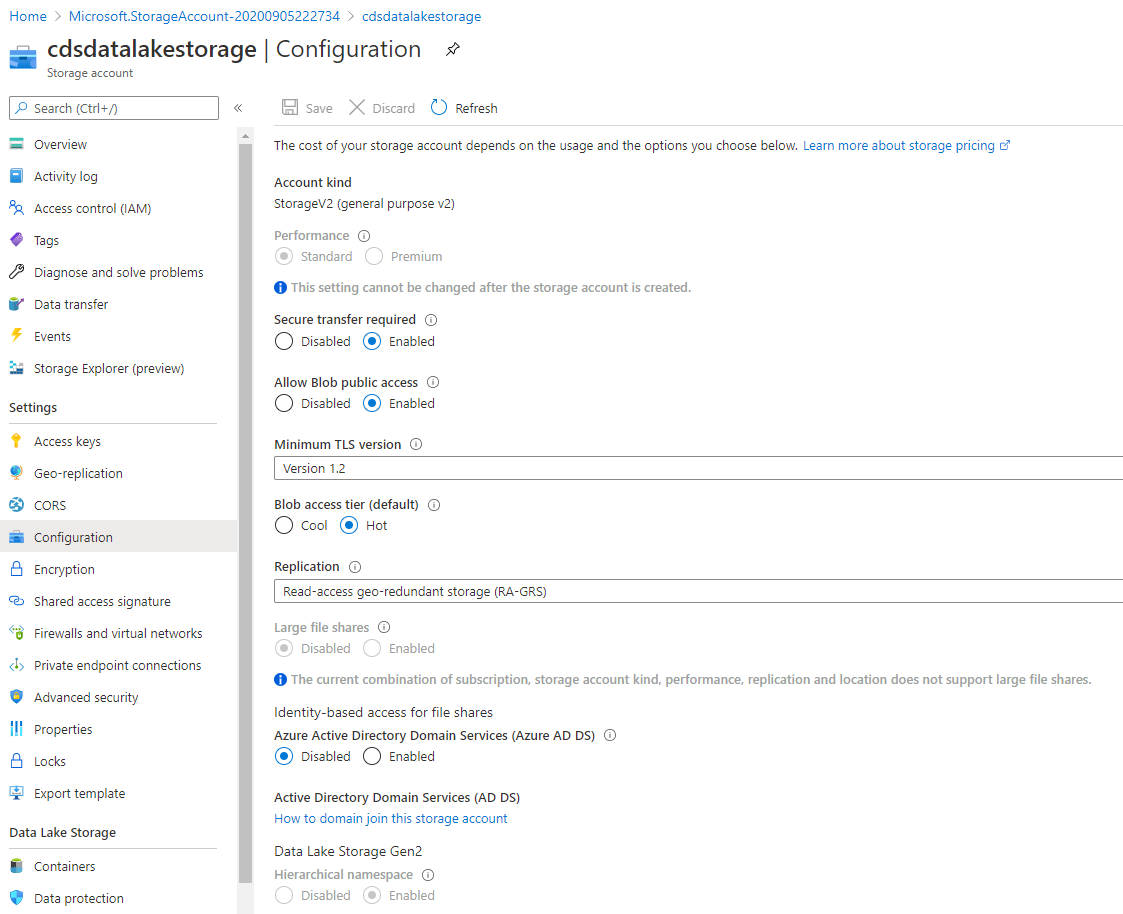
You can now go ahead and create the Storage account. Once the Storage account creation has been completed, click on the Go to resource button to navigate to your Storage account, and the under the Settings group of your Storage account click on configuration. Verify here that under the Data Lake Storage Gen2 section, the Hierarchical namespace is set to Enabled (this setting cannot be changed after it has already been created). See the screenshot below for the Configuration screen.
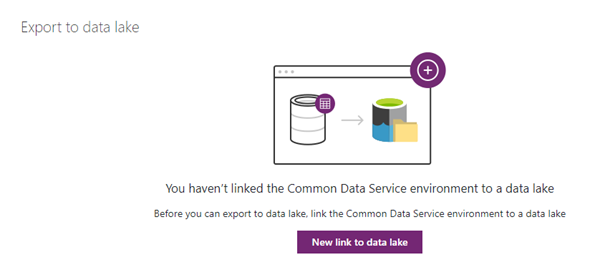
The next part is to configure the Export to data lake from within your Power Apps Maker portal. Navigate in your browser to make.powerapps.com (within the same tenant as your Azure subscription in case you have multiple). Expand the data section in your left navigation area and click on Export to data lake. Your will see the screenshot below.
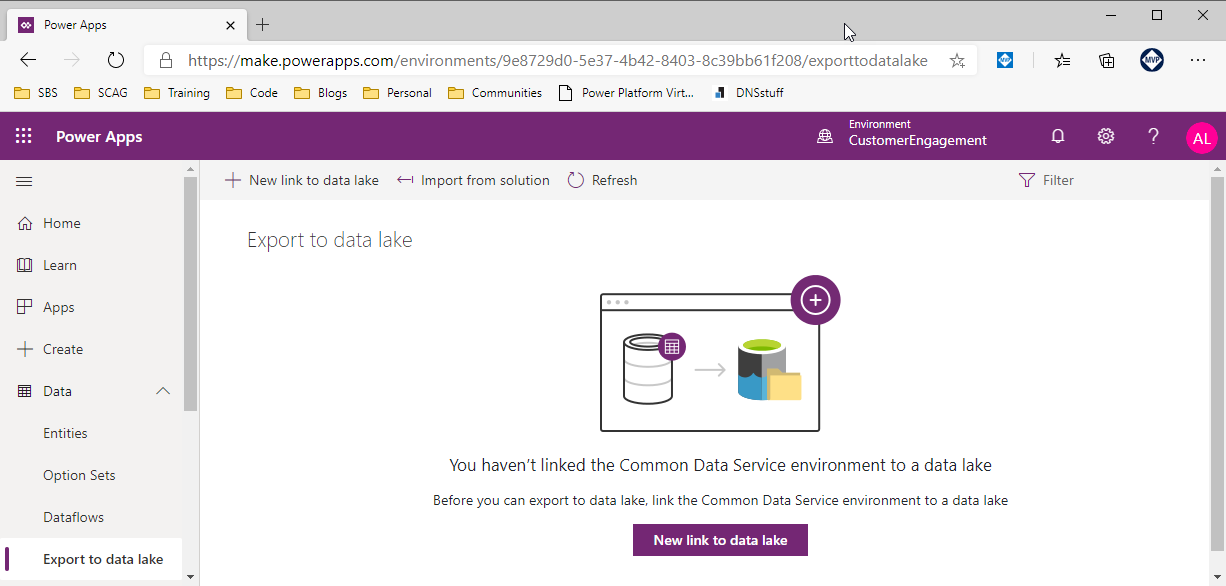
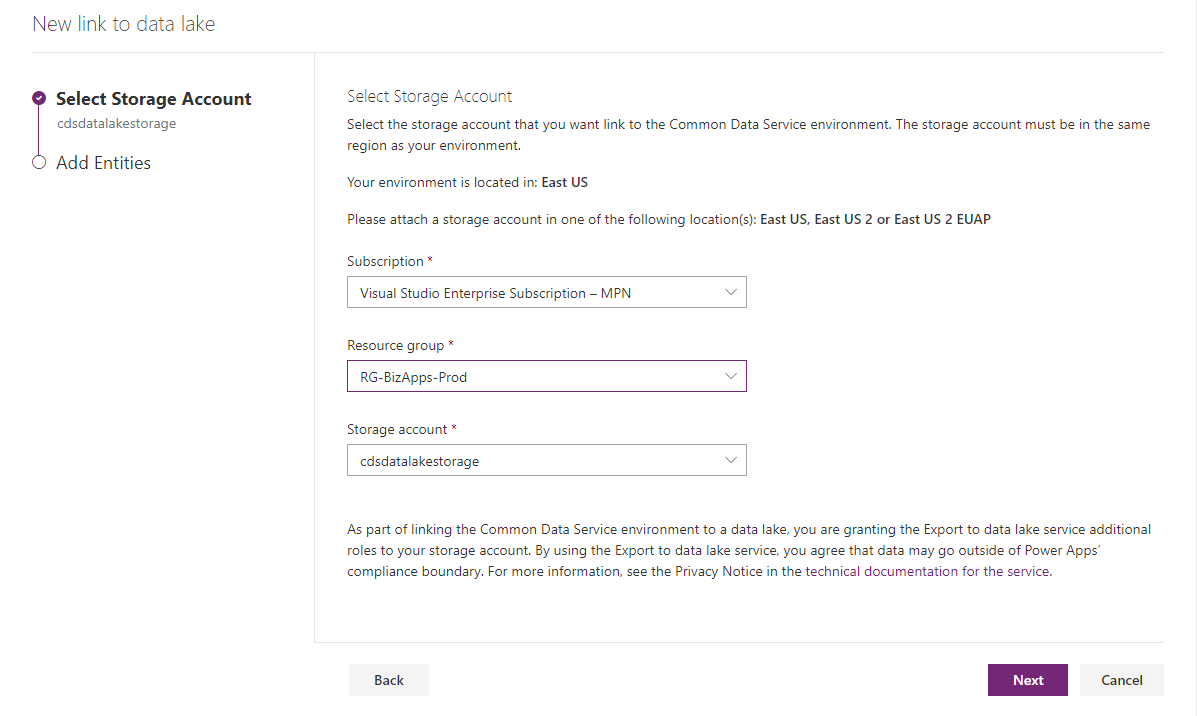
Click on the New link to data lake button to start the configuration. On the first page of the configuration, you will need to select the Storage account in Azure that we just created. Notice that before the selection you see the message that specifies where your environment is located and that you can only attach storage accounts within a particular location or locations. This is the reason that we mentioned earlier make sure they Storage account you created is within the same region as your Power Platform organization.
Select the Subscription, Resource group and Storage account as shown in the image below, and then click on the next button.
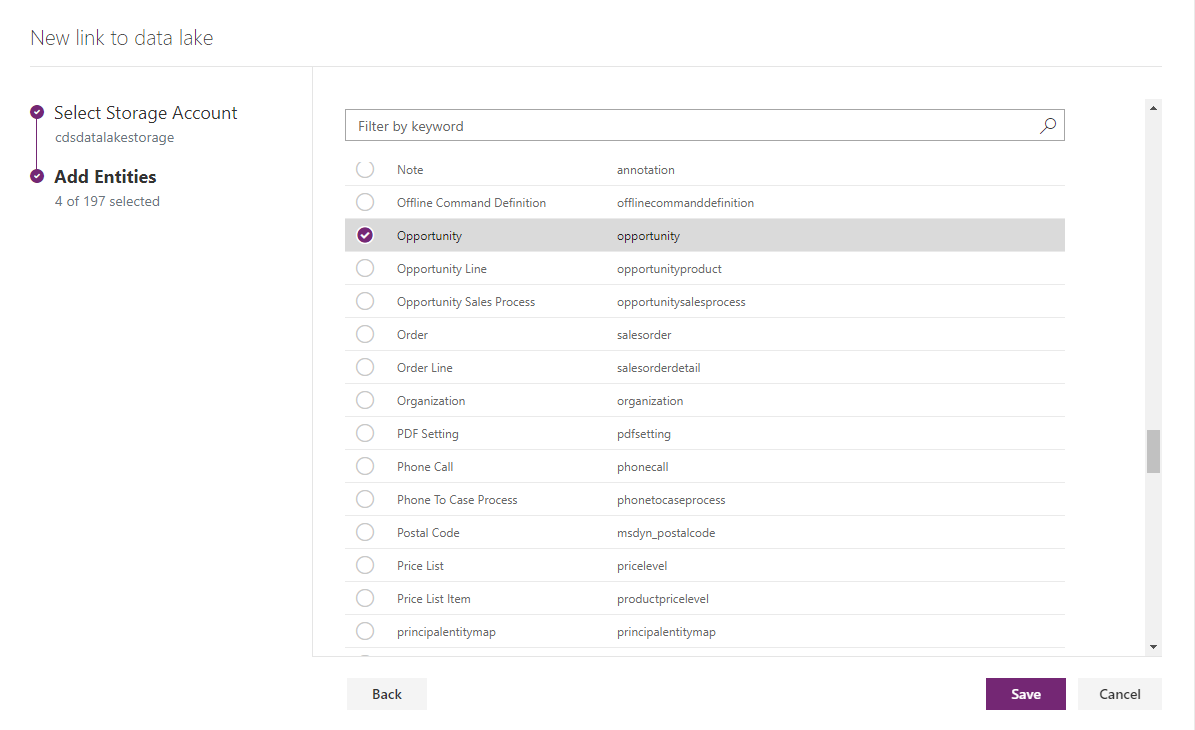
Next, you will need to select the entities that you want to add to your Azure Data lake. You can select all entities or only a subset. In our case, we selected a subset of entities, as this was only a test run. When you have selected the entities that you want, click on the Save button (as shown in the image below).
NOTE: The process started and I received a 503 (Forbidden) error. I tried to look online for any encounters of this error, but could not find anything concrete. I clicked on the Back button, and followed the process again, and this time it was successful.
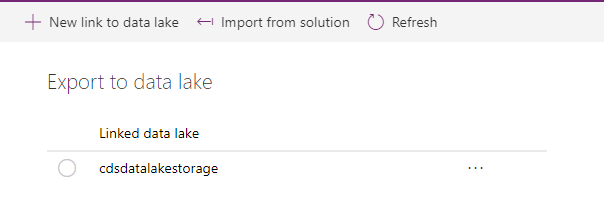
One the process completed, your will see linked data lake in the list, you can click on the More Options (…) and select the Entities link to see the status of your synchronization.
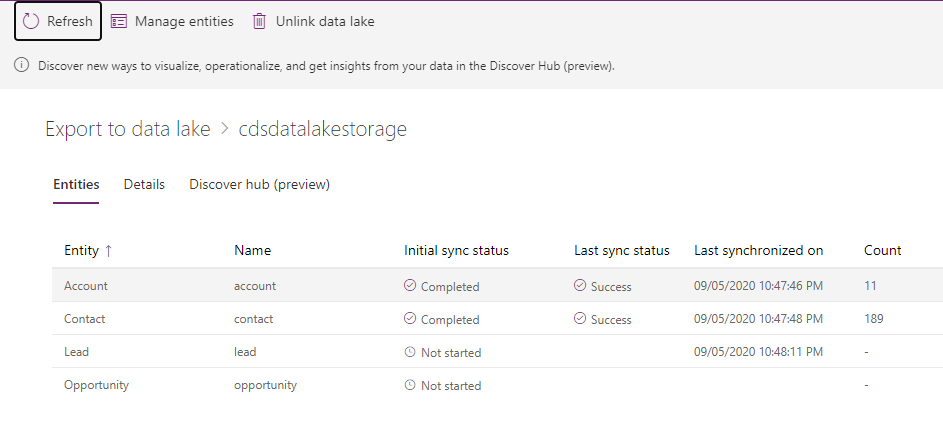
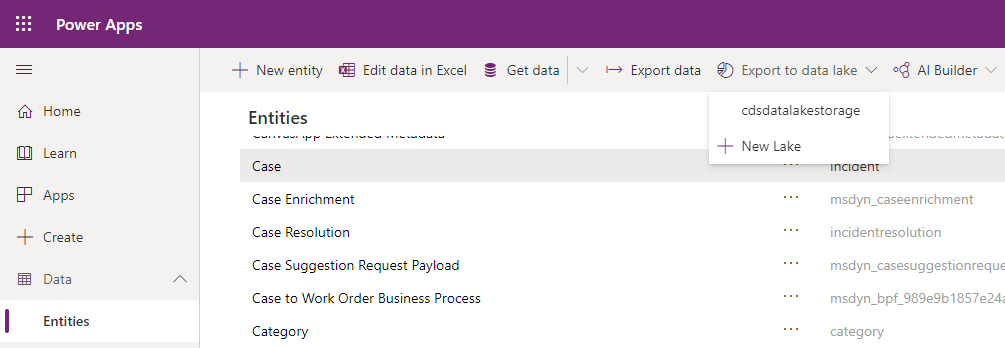
When the synchronization is complete, if you want to add more entities, you can click on the More Options of the Linked Data lake view, and select Manage entities. This will give you the screen to add additional entities. You can also add entities to your Data lake directly from within the entities view under Data. Simply click on the entity name, click on the drop down arrow next to the Export to data lake on the command bar and select the name of the data lake that you previously created. This is shown in the image below
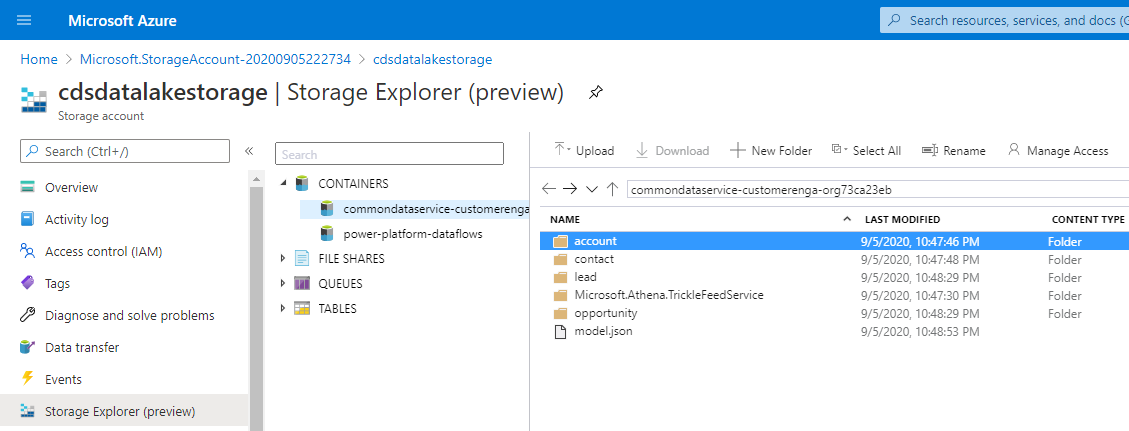
Now that we have finished the synchronization process, and all the entities have been synchronized with Azure Data lake, let’s go back to Azure and see the results. In Azure, go back to your Storage account that you created for the Data lake, and click on the Storage Explorer (preview). You will see there a few groups of available Azure Storage options, which are Containers, File Shares, Queues and Tables. Expand the Containers within the tree, and select the Container name that has the instance name that you used for the Data lake. The name will be in the format: commondataservice-environmentName-org-Id. In the screenshot below, you can see that we have the account, contact, lead and opportunity folders, which are the entities that we selected for the Azure Data lake sync. You will notice the model.json, which contains the schema of all your Data lake entities. You can download the schema, unminify it and view the data that is available in it. The image below shows the screen of the Azure Data lake container.
If we click on one of the folders within the Azure Data lake Storage account, we will see a csv file that contains the data from that entity as well as a snapshot folder which will contain a point in time view of the data before any changes are made based on create, update or deletion of data within our Common Data Service. The image below shows items within the account folder.

I hope that this provides some insights to anyone that has plans to implement synchronization with Azure Data Lake.

