It has been quite some time since Microsoft announced the use of oAuth to connect between Server environments, but many organizations are still using username and password to connect to Dynamics 365 or the Command Data Service (CDS).
I recently had to work on a migration project, and while this customer was using legacy credentials to authenticate, they had no problems doing so with all of their environments. After they provisioned a new environment, suddenly they started receiving authentication exceptions from their data migration tool (using Kingswaysoft and SSIS).
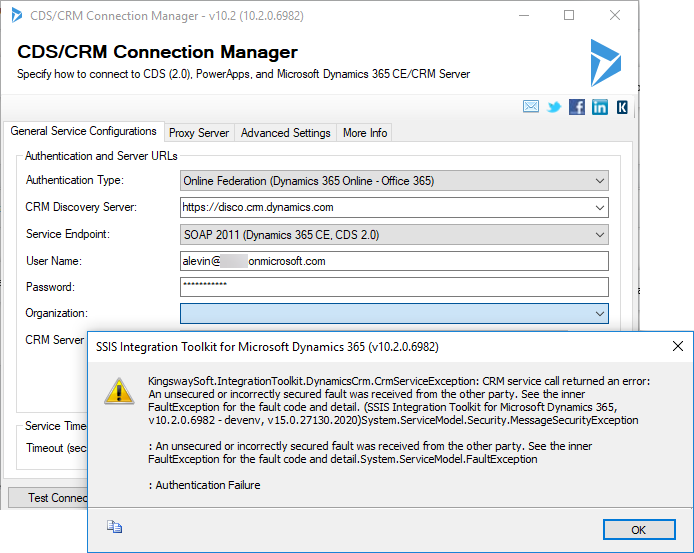
When trying different methods of authentications, we received several different errors, but the basic error was Authentication Failed:
George Doubinski from crmtipoftheday.com pointed me out to checking if I was blocked by conditional access. Check his blog post here.
After going through several posts on Microsoft, I set up Server to Server connection using an App Registration and Azure Active Directory. Below are the step by step instructions on how to implement this.
We start by logging in to Azure Active Directory using the Url and logging in with an Azure Admin account below:
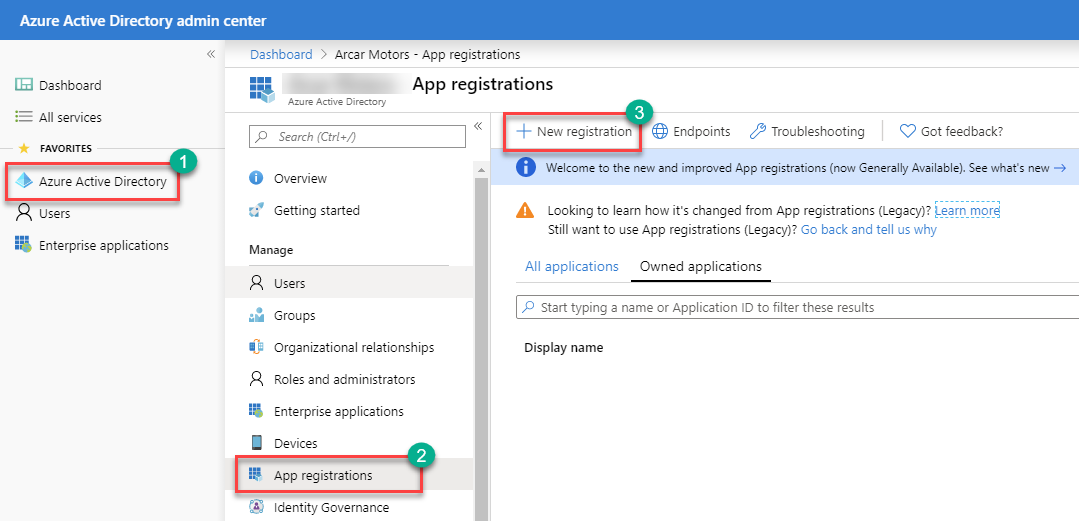
The first thing that we want to do is register an Application. We do this by clicking on the Azure Active Directory (1) and then selecting App Registrations (2), and in the App registrations section, click on New Registration (3).
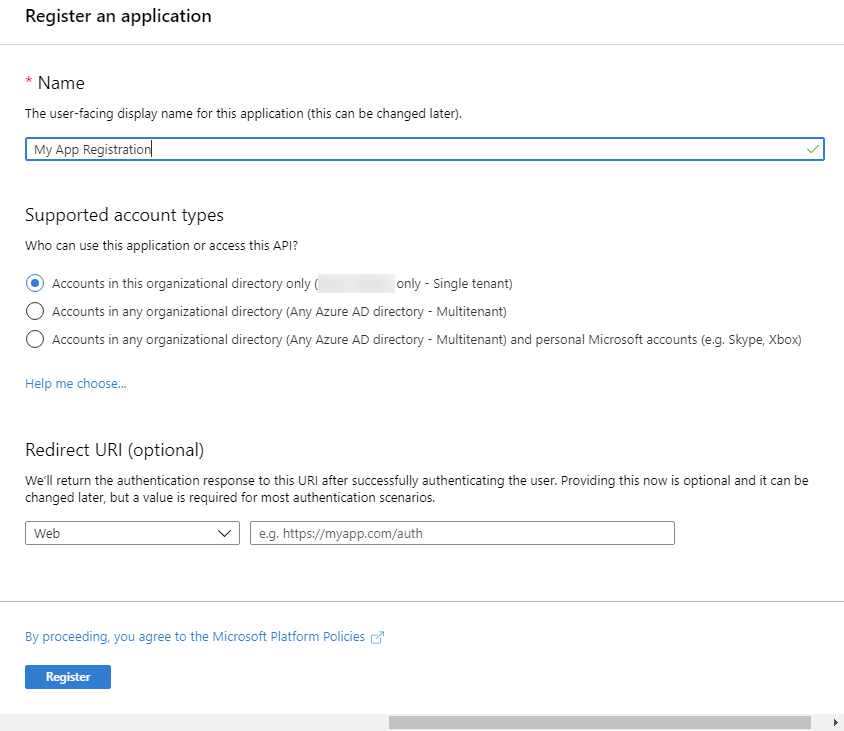
Fill out the registration information by entering the name of the App and selecting Accounts in this organization directory only (Single tenant). You can ignore the Redirect URI for this purpose now.
After you click on the register button, you will see the new registered app in your list of App registrations.

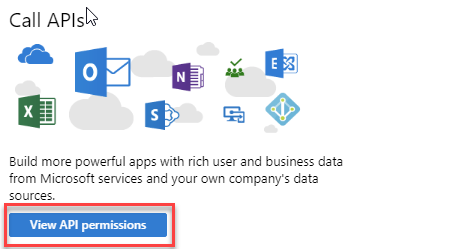
Click on the hyperlink of the App that you just created. This will navigate you to the properties of the application so that you can configure it. In the App overview page you will see the information about your app which includes the Application (client) ID, Directory (tenant) ID and Object Id as well as additional settings. You will also see a button that says View API permissions under the Call APIs section.
Click on the View API permissions button to allow this new app to delegate to Dynamics 365/CDS.

In the API permissions section, click on Add a permission to Add a permission to Dynamics 365. By default you will see in that window that there is Read permissions to the Microsoft Graph API.


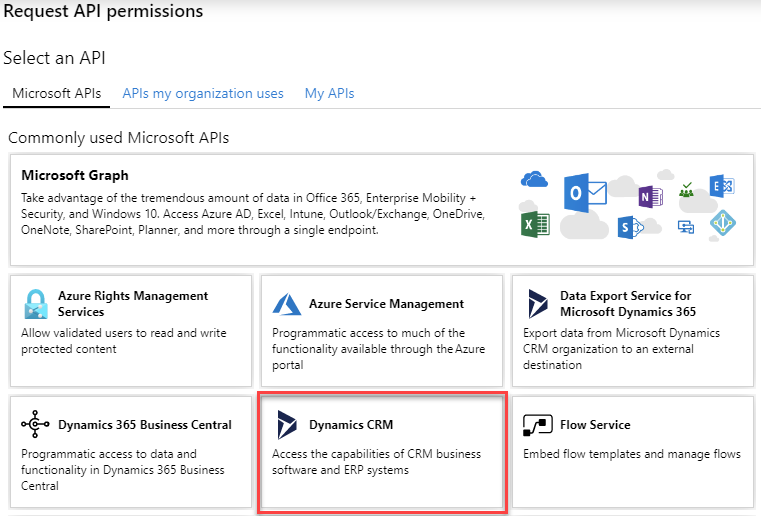
This will pop up the Request API permissions area. In there look for Dynamics CRM under the Microsoft APIs. Click on the Dynamics CRM API, to request access to that API.

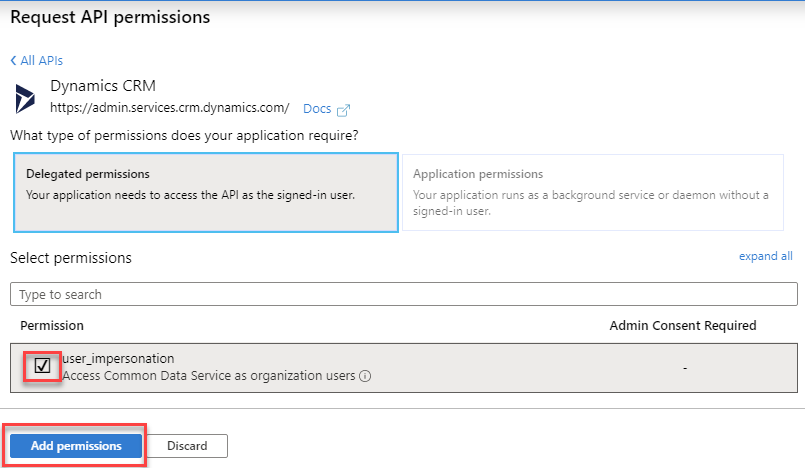
The Dynamics CRM API will allow you to only choose Delegated permissions, and the only available permission is user_impersonation. Select the user_impersonation check box and click on the Add permissions button.

This will bring back the previous screen, but you will not see both the Dynamics CRM and Microsoft Graph permissions on the list. At the bottom of the screen, click on the Grant admin consent. This will ask you if you are sure. Click Yes to finish granting the consent.


At this point you will finalize the App permissions. We will not need to provide a Client Secret, as this value is required for Server to Server connectivity.
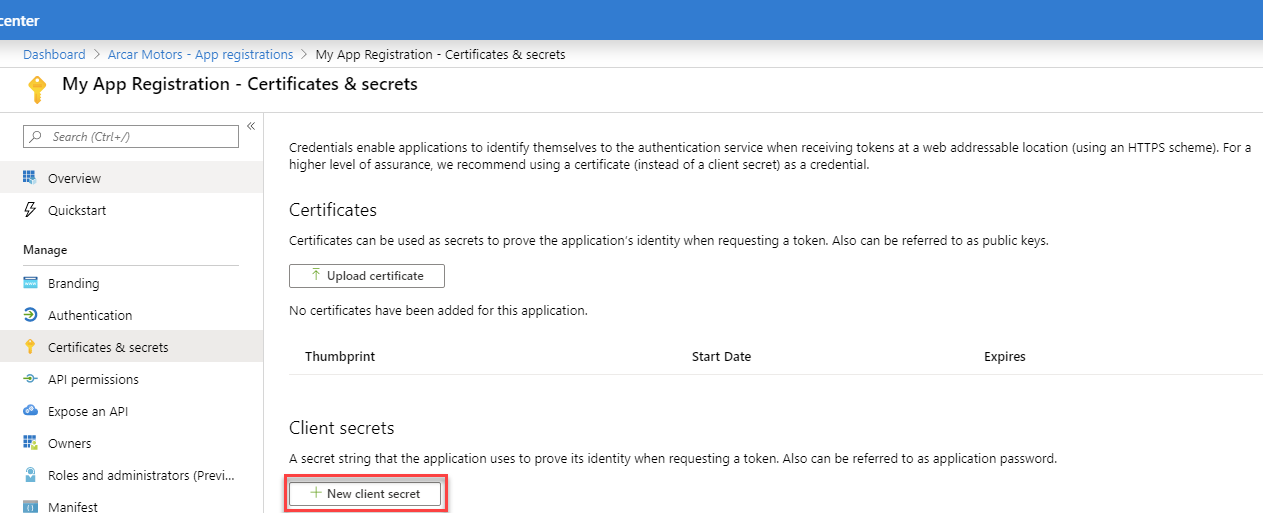
Click on the Certificates & secrets in the navigation, and in the new area, click on the New client secret button.

In the Add a client secret popup enter a description and expiration option (1 year, 2 years or never expires). When done, click the Add button
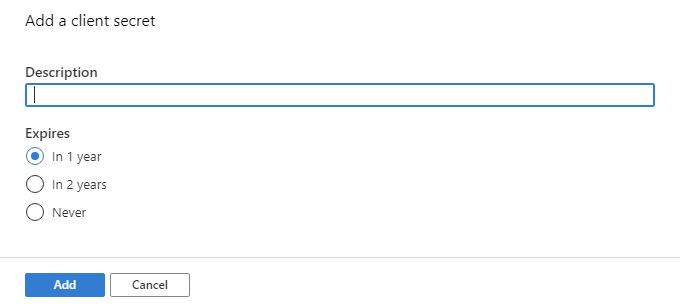
The newly created Client secret will be displayed in the Client Secret section, with a copy button. Copy the Client secret, and store in a location where you have access to it. You will not be allowed to copy it again after you navigate away, and you will need it to connect to your environment.


The next step is to create an application user. This user will be added to Dynamics 365 and will have access to run as an Application User.
Click on the Users link on the left hand side (under Azure Active Directory), and the click on the New User button. You can also click on the User link from within Azure Active Directory if Users is not available under your favorites.


In the New user window select the Create User option, and then provide the identity information: Username, Name, First Name, Last Name, and the click on the Create button.
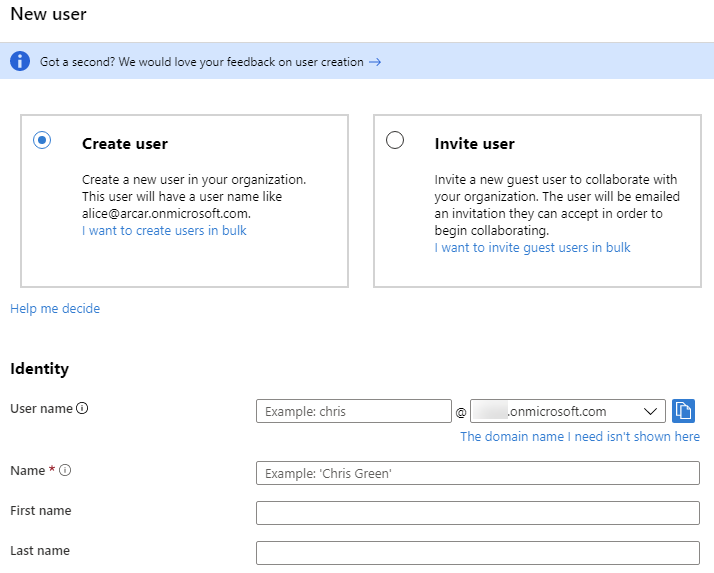
Once you are done adding the user, the new user will appear in the All Users list. You can click on Reset password to change the password for this user.

The final step is to add this user to Dynamics 365 (or your CDS environment). Login to your Dynamics 365 environment and navigate to the Users entity, by click on Advanced Settings from the Settings area.

Navigating to Settings -> Security, and click on the Users group.


Change the selected view from Enabled Users to Application Users, and click on the + New button.

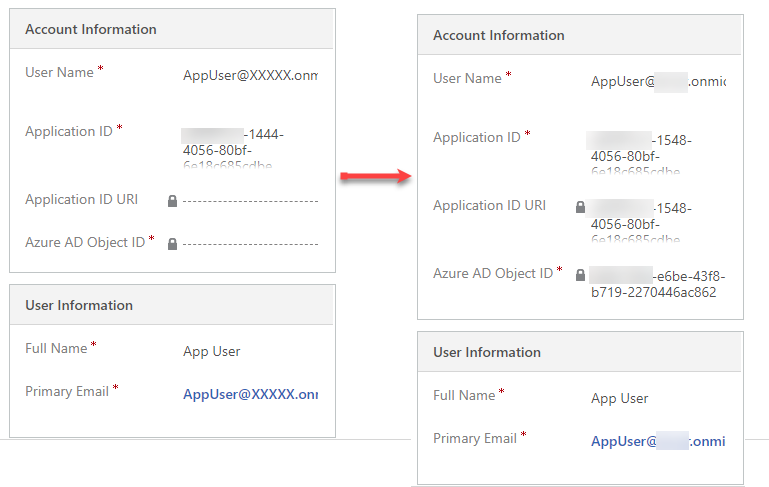
The new User: Application User form will open up. Specify the User Name (Email Address from Azure AD), the Application ID, the User Full Name and the Primary Email of the User that you created. When you save the record, the Application ID URI and the Azure AD Object ID should be automatically filled out.
Finally, once you have completed these steps, you should be able to re-authenticate with Kingswaysoft using oAuth as shown below. You are not going to need to enter user credentials, but just the Client Id, Client Secret and the organization url as shown below.
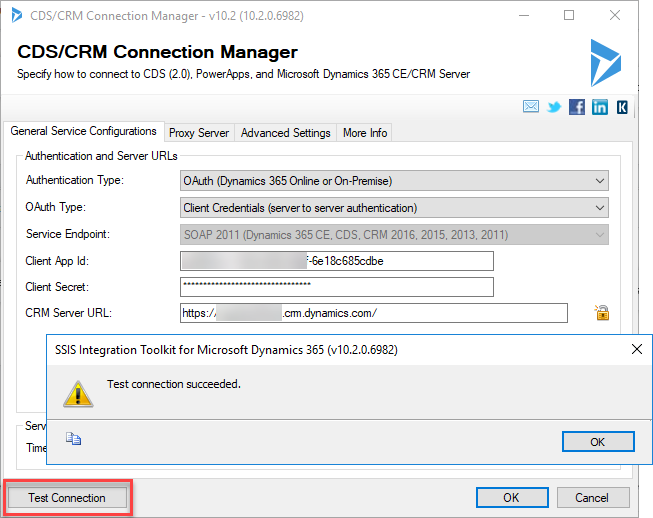
Clicking on the Test Connection button will now allow you to Connect to your CDS or Dynamics 365 environment and start moving your data.

