We recently got a request from a client that wanted to prevent modifications of Contacts from the Outlook Client back to CRM.
We went back and forth trying to implement this with security roles and other options, but none of the solutions were perfect.
Finally we decided to implement this using Plugins.
The solution was to allow Outlook to make the changes, but as soon as they are made, revert them back to their original values.
There were four parts to the solution:
Step 1 – Creation of a temporary entity to hold the values that are modified by the Outlook Contact record.
The first step is to create a holding tank or staging entity that will store the changes that were performed to the Outlook Entity.
This is a simple entity that will have the name of the field, the original value and the changed value. Those values will be updated in the entity by the Contact Update Pre-Operation Plugin.
The screenshot below shows the Sync record portion of with the modifications that were made in an Outlook record.

Step 2 – Creation of a revision or timestamp field in the CRM Contact record.
The next step is to create a field in the CRM Contact entity that will always be modified.
You can create a revision field or a timestamp/date time field that you will update in JavaScript when the form is being loaded or saved.
If you use a revision field, make sure to increment the value of the field before the form is saved.
This will tell the plugin there were changes in the form that were called from the CRM form and not from Outlook.
If you use other methods to make updates to your CRM Contact form besides the CRM Form and Outlook, then make sure to update the code in those CRM Update method calls to also increment the revision or modify the timestamp.
Step 3 – Creation of a Contact Update Pre-Operation Plugin Message to store the changes done by Outlook
The next step is the creation of the first Plugin Message. This message will be called before the changes are saved to the Outlook Contact record.
In this step we will first check if the Plugin was called from CRM or Outlook.
If it was called from CRM, we will not do any processing, however if it was called from Outlook we will start processing the changes.

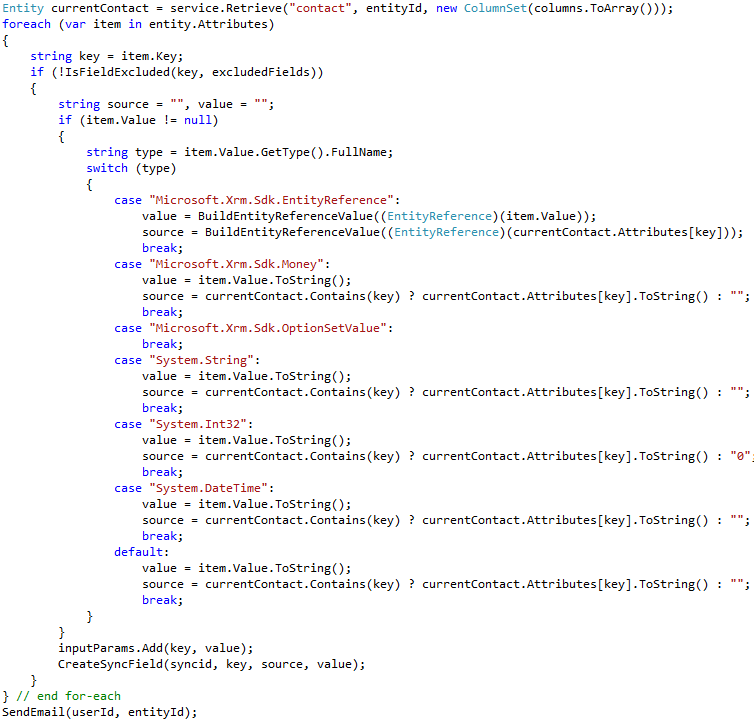
The GetInputParams method will retrieve the existing field values of the contact record in CRM.
It will then loop through all of the fields that were modified, and for each field that was modified create a SyncField in CRM with the name of the field, the existing value and the requested value.

Our application also sends an email out to an administrator that these changes were required.
Step 4 – Creation of a Contact Update Post-Operation Plugin Message to revert the values back
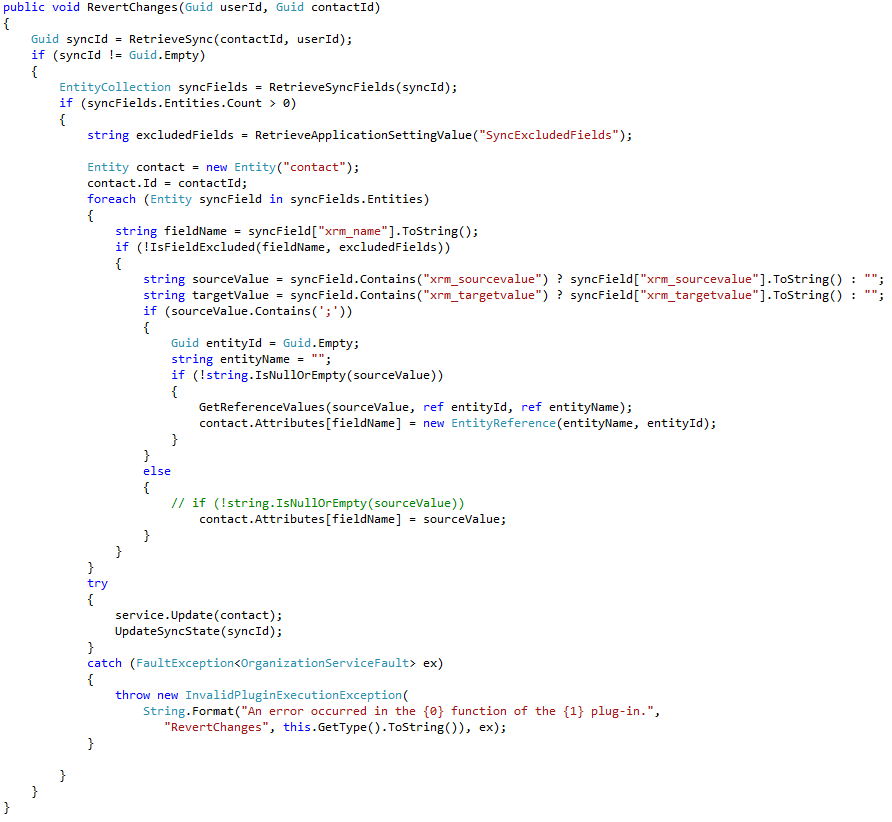
The last step retrieves the records that were temporarily stored in the SyncFields entity and modifies the Contact entity with the values that existed before the changes that were initiated from Outlook.

Step 5 – Optional approval process
Step 5 is an optional state that will call a Plugin on the Outlook Sync entity that will accept the changes that originated from Outlook.
If you would like a demo of the One-Way Sync process (or solution), contact us here.
