Since the announcement by Microsoft at the Microsoft Business Applications Summit last month, and even before, I’ve been eager to take a look at the new SQL Connection for the Common Data Service Endpoint. What this means is that we can not write and execute SQL queries against the entity data.
In order to get started, the first thing that has to be done is enabling the Endpoint, so that we can create a connection from SQL Server Management Studio (SSMS) to our Dynamics/CDS environment. As of now, there are two ways to enable this endpoint.
The first is by navigating to our environment in the Power Platform Admin Center. Click on the settings in the Command bar for the environment, expand the Product collapsed section and click on Features. On the features page change the toggle for TDS endpoint from Off to On.

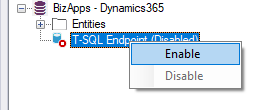
The other way to get the same results is by using the SQL 4 CDS Plugin for XrmToolBox by Mark Carrington (make sure that you have the latest version). Open the Plugin and connect to your environment. In the Object Explorer pane, under entities, you will see the T-SQL Endpoint tree option.

Right click on the T-SQL Endoint (Disabled), and select Enable:

Making this change will allow you to make connections to your CDS environment using the new T-SQL endpoint.
The next thing is we need to connect using SQL Server Management Studio. I am using SQL v18.5, but you should be able to use it with some of the prior versions. The main thing is how we connect to our cloud database.
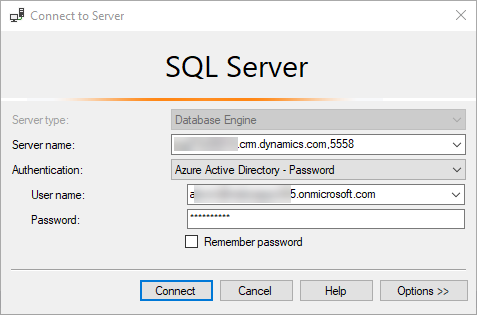
Within your SSMS, in Object Explorer, click on Connect and select Database Engine. This will pop up the Connect to Server window. In the Server name, enter the Organization Name following by the region and the port. The format would be as follows:
orgname.crm{region}.dynamics.com,5558
If your organization name is crmdemo and your are in North America, the Server name would be: crmdemo.crm.dynamics.com,5558
Next, we have to provide the authentication method. Based on your connection there might be a few different options for you to use. You will need to choose one of the three Azure Active Directory Authentication methods based on your connection settings.
I have tested this out with both Azure Active Directory – Password, which is used when you are connecting using a Username (email) and Password as well Azure Active Directory – Universal with MFA, which will user your organization’s MFA settings to connect.
In this post, I will be using the Azure Active Directory – Password. If you are the only one using the computer, you can check the Remember Password. The screen below (with a few blurs), shows how the connection dialog will look like.

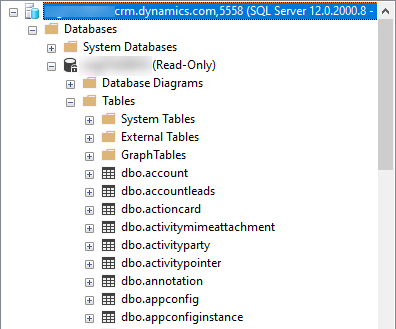
Finally, our Object Explorer can be expanded, and we will be able to see all of the available tables that we can query on. The image below shows a partial list of the tables that are available:

A few things to note.
- This is still in preview and not available in all regions
- The database is in Read-Only state, so no updates can be performed (I am not sure if and when that will change)
- Only tables and table columns are provided, but there are no custom views or stored procedures. The tables also display the name attributes from related entities.
- Although what we are seeing in our database shows under tables, these are actually the filtered views.
- The supported SQL operations include: Batch operations, SELECT, aggregation functions, UNIONs, JOINs and Filtering
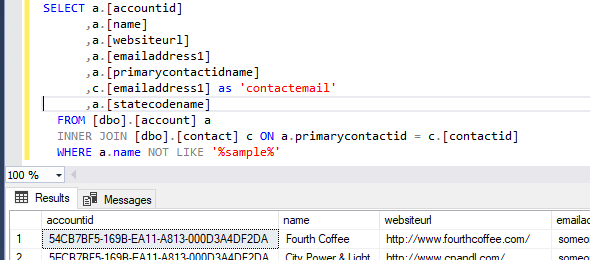
Finally, I tested a few queries out including JOIN and Filtering options and got the results just as expected. You can see the screenshot below.

Hopefully you are excited about this great new enhancement.

